Saturday, September 3, 2016

5 Steps to Conquering Meal Planning Once and For All!

I I feel like I have finally somewhat conquered something in my 36 years of living...the weekly chore of meal planning and buying groceries. I know, I know, it seems trivial, but seriously, I used to spend HOURS on this and come out spending waaay more money and time than I intended. I tried clipping coupons every week, playing "the grocery game", pinning recipes like crazy...I was on a mission to figure out the best way to plan meals for our family on a limited budget and limited time.

Here's what I've found that works for my family. Obviously you can tweak it to fit your needs and schedule, but hopefully it will help some of you who are in the same boat I was in. This has truly been a lifesaver for our family and has saved me so much time and money.

So here's my process of meal planning:


  1. Create a database of your recipes. 

    Pinterest is a great place to find new recipes, but if you're like me and have over 2,000 recipes on your recipe board, it can be hard to go back and find what you're looking for.

    However you like to collect your recipes you use on a regular basis (notecards, the computer, a website, a recipe book, etc.) keep them all in one spot, organized by type so you can find them easily.

    I chose to keep my database of recipes on plantoeat.com.  You can enter in your favorite recipes either with a recipe clipper that will automatically insert a recipe straight from the internet into your file, or you can manually type it in.  Once you import your recipes, you can then plan your meals for the week and name your menus for future reference. It will even generate a grocery list for you based on your meal plan. They offer a free trial and then the subscription is $4.95/month. Totally worth it in my opinion. (I am not paid to promote this company--just a fan.)

  2. Make weekly menus that you can rotate out.

    I have 6 weekly menus that I rotate out on Plantoeat.com. Therefore, when I am planning meals for the week, I just pick 1 of the menus and print out the grocery list on Plan to Eat. Some of our family favorite recipes like spaghetti and tacos are on multiple menus and others are only used once. Sometimes I'll change up the menu and add in a recipe from Pinterest that I'd like to try. If we like it, I leave it in the rotation.

    When creating my menus I try to follow this format just to make meal planning less overwhelming:

    Sunday: Comfort food
    Monday: Italian/Pasta
    Tuesday: Mexican
    Wednesday: Eat at church
    Thursday: Breakfast
    Friday: Pizza/Eat out
    Saturday: Grill


    (On the days that I work, I try to plan crockpot recipes or foil dinners that I can just throw in the oven. I plan the guinea pig dinners (aka Pinterest recipes) for the days that I'm off and have more time to cook.)

    Here's a screenshot of one of my meal plans on Plan to Eat.


  3. Write down your entire grocery list in one place.
    I use this handy little meal planner that I made a couple years ago and write down my meal plan for the week and grocery list (including everything on the grocery list from Plan to Eat.)


    Click here to see the original post and download the meal planner.

  4. I order my groceries online using Kroger Clicklist.
    Online grocery ordering is the BOMB! If you have this in your area, I highly recommend doing it. I use Kroger Clicklist and it is the best thing that's happened since sliced bread. Using my grocery list, I order my groceries online, schedule a pick-up for the next day, and then pick them up. You don't even have to get out of our car! As a mom of 3 kids who eat me out of house and home, I feel like Kroger has literally given me my life back.(If you don't have Kroger in your area, check with HEB and Wal-Mart--they have many participating stores as well.) Not only do I save time by not having to drag my kiddos to the grocery store for 2 hours (plus driving time), I also save money because I don't impulse buy and I can check and see what I have on hand, which eliminates buying another box of sandwich baggies when I already have 2 in the drawer.
  5. Prep food for the week on Sunday.

    I schedule my pick-up for Sunday and then come home and prep snacks and lunches for the entire week. This usually takes me a couple hours, but saves sooo much time and stress throughout the week.  I will go into this further in another blog post.

    Ya'll I am not an organized person by nature, so when I get one aspect of my life organized and can stick with it, I want everyone to know about it! Hopefully this helps someone else out too.

    What makes meal planning easier for you? Feel free to comment and share your tips and ideas!

    **All opinions in this post are my own. I am not compensated to endorse any company mentioned above.**
Happy Meal Planning!


Monday, May 2, 2016

How to Create a System for the Piles of School Papers and Free Printables!

Does anyone else feel like they are literally D R O W N I N G in school papers by the end of the school year? Trust me, I was there. I would empty the boys' folders every night and add the papers to the growing stack stuffed in the bottom of the coffee cabinet. Because if I can't see them, the problem isn't there. Eventually I knew I had to tackle this issue, but I just couldn't bring myself to throw any of their genius work away. I mean, what if in 20 years I want to look back and see them add 2 + 2 fifty different times??My boys are only in first grade and Pre-K so if I didn't tackle it now, what would it be like when they are Seniors? I envisioned an episode of hoarders.

I am happy to say that I created a system for organizing my kid's school papers that actually works! I am not an organized person by nature, so if it works for me, seriously anyone can do it! It just takes a little bit of prep time, but I promise it's worth it.


The first thing I did was purchase some 1" white binders and clear page protectors. My goal was to condense all of the papers from that year into that one binder and throw away (eek!) the rest.  As I sorted through the papers, I just kept 1 of each kind.  So if there were 50 math papers where he added single digit numbers, I just kept 1. If there was special artwork or something unique, I kept it. Everything else got trashed. Let me tell you, my husband had to pry it out of my hands and throw it in the trash can, but I haven't regretted it. 

Next, I created the title pages for each book and printed them out. Each year, I purchase one 5x7 school picture to go in the book and forego the whole picture package. It's way overpriced and we have professional family pictures done every year anyways.


I just love this picture that Levi drew on the back of one of his school papers. He loves drawing pictures of cowboys :)


Now I can easily see the highlights of each year and its something that we can look back at in 20 years and appreciate.

I'm including links to the cover sheets and binder labels I created, so you can download them for FREE!


I'm working on getting the rest of the printables listed in my Etsy shop, so be sure to check back soon for those!
I'd love to hear from you! Do you have any tips on organizing your kid's school papers?

Happy Organizing!


Saturday, April 30, 2016

Farmhouse Living Room Inspiration and Mood Board

Farmhouse style is ALL the rage right now thanks to Chip and Joanna Gaines of Fixer Upper (my FAVORITE show by the way!) I just love this living room designed by Yellow Prairie Interiors! There's something so cozy and inviting about farmhouse interiors-it makes you want to grab a good book and a cup of coffee and just jump into the space!


This was my inspiration for creating my farmhouse style mood board.  I stumbled upon Yellow Prairie Interiors on Pinterest and I'm in love with her style. She has an instagram account too. Seriously, check her work out. It's amazing. 

I used to love making mood boards in design school. In fact, it was always my very favorite part of the project. So I have decided to make this a regular feature on my blog. I will take an inspiration room and search out the internet for similar items on an affordable budget. Because if you could afford to pay $350 for faux hydrangeas you could hire your own personal designer, right?  
The links to purchase the items are located at the bottom of the board. Have fun bringing farmhouse style into your home! 


sofa: Nebraska Furniture Mart//wire tray: Hobby Lobby//baskets: Target, H&M//coffee table: Walmart//pillows: Kirklands, Joss & Main, Peek Pillow Originals Etsy Shop//clock:  Target//farmhouse sign: WoodenThatBeSomethin Etsy Shop//topiary: Pier 1 Imports//lamp: Kirklands//Faux Hydrangeas: Pottery Barn

I'd love to connect with you and hear about your amazing farmhouse finds!


Monday, April 18, 2016

The Best Star Wars Party Ever!


My boys are OB-SESSED with Star Wars.  And when I say obsessed, I mean that is all they talk about.  So when I asked Hudson what theme he wanted for his 5th birthday party, it was no question.  This ended up being one of the most fun birthday parties I've ever planned!

We made Jedi robes for all the kiddos out of brown sheets from Walmart and made light sabers out of pool noodles. I'm telling ya, just give a little boy a pool noodle and it's like free entertainment for 5 hours! 


You can't have a Star Wars party without Princess Leia, right??


For table decorations, I splatter painted black butcher paper with white paint and cut out the letters with my Silhouette Cameo using the free Star Jedi font available here

I found a Star Wars crawl generator on Star Wars.com and had it playing on my laptop during the party. 


Click here for Star Wars Crawl generator.

Unfortunately I didn't get good pictures of the food but here is what we had:
Darth Vader Punch (red cool aid)
Jabba the Hut Dogs (hot dogs)
Princess Leia buns (hot dog buns)
Light Sabers ( pretzel sticks)

(I kept the food pretty simple and focused on the games and activities.)

When the kids arrived, we handed out Jedi Training Cards.  When they completed each activity, they got a star in the box.  


ACTIVITY 1:  DEATH STAR BEAN BAG TOSS
We used a corn hole board, but you could use a bucket if you don't have one. For the death stars, we wrapped up bean bags in foil. 


ACTIVITY 2:  BUILD A SPACESHIP OUT OF LEGOS
I knew I would need a break, so I set out a tub of Legos and let the kids have at it! They loved building their own spaceships and I got to actually sit down and eat a hot dog! Woohoo!


ACTIVITY 3: USE THE FORCE!
Ok. Want to know how to impress a bunch of 5 year olds? Get a toy Star Wars spaceship and glue a magnet to the bottom.  Put it on a plate and hold a magnet underneath the plate with your other hand. Let kids take turn using the force to make the spaceship move. They will love it! I promise!
Thank you to Raegun Ramblings blog for this idea!.


ACTIVITY 4:  STORM TROOPER TRAINING
Draw Storm Trooper faces on white balloons with a sharpie and let the kids try to keep them in the air with their "light sabers."

The template I used to draw the faces can be found here.


Look at the concentration on his face!

ACTIVITY 5:  LIGHT SABER TRAINING:
Blow bubbles and let the kids practice their Jedi skills by popping the bubbles with their light sabers.


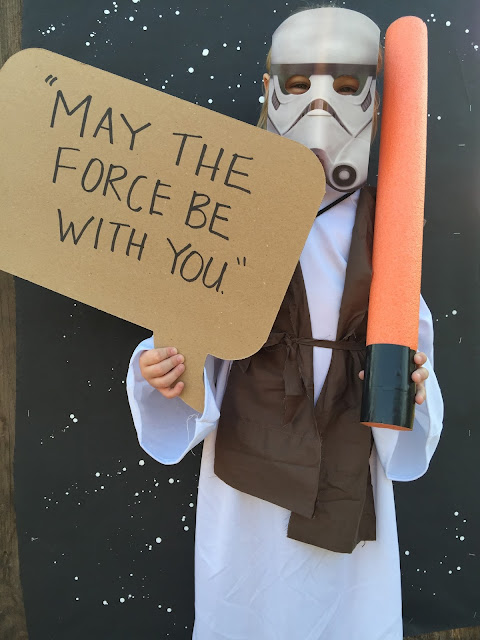
ACTIVITY 6: PHOTO BOOTH
For the background I took a piece of black butcher paper and splatter painted white paint for the stars.  


I found this free overlay by Amy on AttaGirl Says blog here. I used the picmonkey app to  put it on the pictures.


Click here to download Photo Booth Sign.

Once the kids had completed all of activities, we had a Master Jedi award ceremony where they got their certificates.


Click here to download certificate.


Pure Joy!!


According to Hudson, it was "The Best Star Wars Party EVER!"

If you use any of my printables, I would love to see pictures of your party! Do you have any other Star Wars party ideas?


Wednesday, October 15, 2014

Fall Birthday Bash


HAPPY FALL!!
This is my absolute favorite time of the year! Pumpkins, hayrides, sweaters, football, coffee, birthdays.... Ahhh pure bliss! I thought a fall themed party for my son's 4th birthday would be the perfect start to fall! I don't know who had more fun, the adults or the kids! 

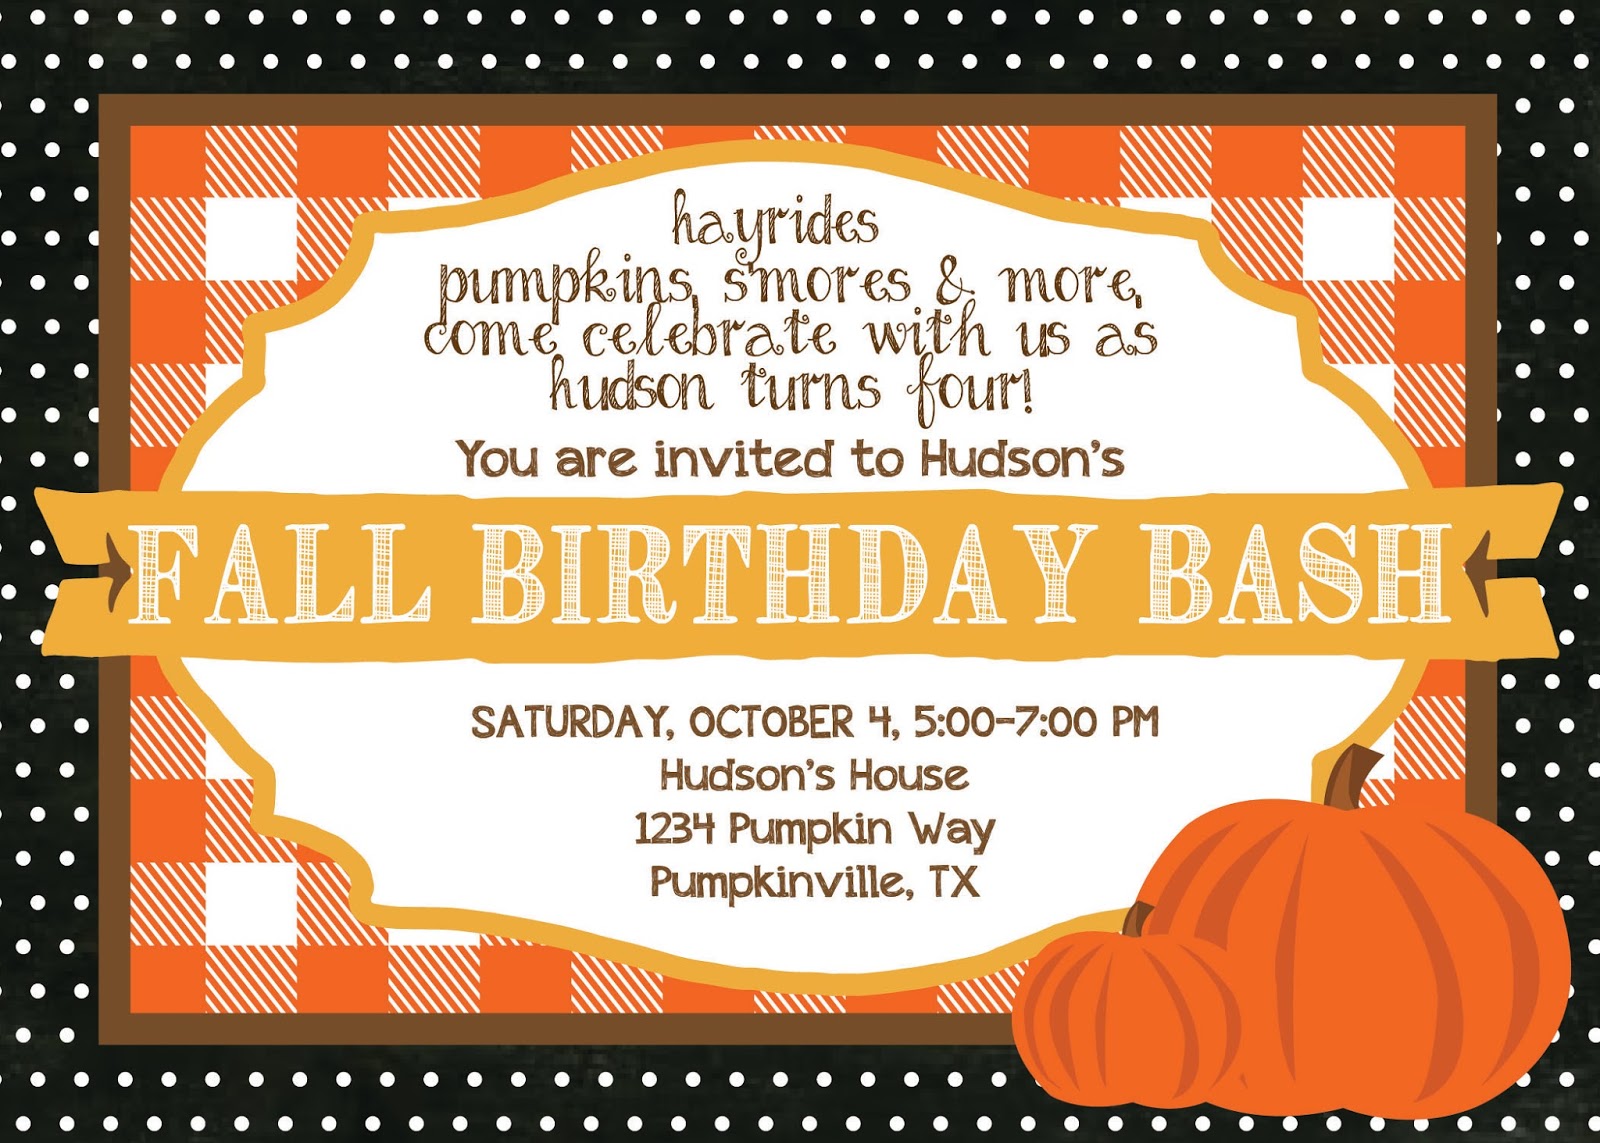
The Invitation:

The invitation is available for purchase in my Etsy shop.

The Decorations


The Menu:
Frito Pies
Hot Dogs
Pumpkin Sugar Cookies
Nectarine pumpkins
Popcorn
Smores


Pumpkin Sugar Cookies:
I found the cookie cutters at Michaels and I used this recipe for the cookies.  I added quite a bit more flour so I could roll out the dough to cut it.  For the royal icing, I used this recipe.  They were a big hit!

Pumpkins:
Ingredients:
Nectarines
Celery
Popcorn:
For this, I just made paper cones out of 12x12 scrapbook paper.  and hung them from a branch that I had my husband cut down.

Activities:
Feed Sack Races


The Hayride

All the kiddos (and Haley)