Showing posts with label diy. Show all posts

Wednesday, July 2, 2014

TV cabinet re-do


It's funny how technology changes the styles of furniture we have in our houses.  A few years ago, everyone had these big bulky tv cabinets to hold our obnoxiously large box tv's. Now, we can just hang our tv's up on the wall. So when my dad gave me this old Ethan Allen tv armoire, I immediately knew I could turn it into a craft closet for all my supplies!  Let me tell ya, this thing is SOLID! It weighs a ton, which also means it is a good piece of furniture!
Here are the supplies I used:

  1. 1-2 cans Krylon spray paint Primer. 6.49 at Michaels
  2. Elmer's Multi-Purpose Spray Adhesive. 4.99 at Michaels
  3. Americana Decor Chalk Paint in Everlasting. 8.99 at Michaels
  4. Americana Decor Creme Wax in Clear. 11.99 at Michaels
  5. 3 packages Everbilt 2 in. x 1-3/8 in oil-rubbed bronze decorative hinges. 3.27/pkg of 2 at Home Depot. After 2 trips to Home Depot getting the wrong kind of hinges, I landed on these. I love how they look on the outside of the furniture.
  6. Pewter Owl Knob. 5.99 at Hobby Lobby. 
  7. Approximately 1 yard of fabric of your choice. I got mine at Hobby Lobby.
  8. Plywood, cut to size for your shelves and 1x2's if needed to place the shelves on.

  • First, I completely gutted the inside, taking out all of the hardware and the nifty swivel stand the TV went on.
  • Remove the back and cover with fabric. Cut your fabric to match the size of the backing and spray the backing with spray adhesive. Staple the edges to make sure it stays secure.  Set aside.
  • Spray the entire piece with primer.  This is not necessary with chalk paint, but it does save a lot of time.
  • Apply 2 coats of chalk paint, inside and out and let dry.
  • SAND SAND SAND until your arm hurts! I like the wood underneath showing through, so I sanded the heck out this baby! I wanted it to look like an old, worn out piece of furniture, not like I looked lazy and only did 1 coat of paint, know what I mean?
  • Apply the wax with a brush, coating the entire piece. Take a cloth and buff it out.
  • Attach the back with fabric by screwing into the back with the existing screws.
  • Finally attach 1x2's to the sides with screws. Mine came with them, but I moved them around to fit my containers. Place the plywood on the 1x2's.


And here's the final product:


I'm in love with how it turned out! I've been waiting for just the right spot to put this old window pane and I think it goes perfect on top of this piece! 


Tuesday, May 27, 2014

Fun DIY Flip Flops to Kick off Summer!


The last day of school was last week so it is starting to feel like summer! But nothing makes it feel more like summer than getting a brand new pair of flip flops.  I decided to spruce up my plain Old Navy flip flops with some bling. Because everyone knows us Texas girls like some bling, right?

Here's what you need:

Swarovski Elements Crystals (approx. 4mm in size)
I got these at Michaels, but they also have them at Hobby Lobby. Make sure they are Swarovski. They cost a little bit more but it is so worth it! They are so much more sparkly, especially when the sun shines on them.  You will need about 4 packages. They are about $5 a package, but you can get them cheaper if you use a coupon. I had a 25% off coupon at Michaels so they only cost me about $15 total. 


A pair of plain black flip flops
I used a pair of black Old Navy flip flops that I picked up for $2.50


E-6000 Glue
You can get this at Michaels or Hobby Lobby.  This is the only glue I recommend because once you glue it, its permanent. Just make sure to do it in a well ventilated area unless you want to get a little loopy because there all all kinds of crazy warnings on the tube.  If you have a 3 year old like me, maybe you want to get a little loopy. Anyways, I recommend doing this outside.

To make them, just take a small brush and paint some glue on the flip flops (a little at a time) where you are going to place the crystals. Do 2 at a time with about 30 crystals on each strap. (120 total). Let dry before wearing them!
The whole project cost about $20!

Tuesday, May 6, 2014

Furniture Re-Do's

Happy Monday ya'll! I'm getting the itch to do another furniture makeover so I thought I would share a couple I have done recently. I will be posting the tutorial on the tufted ottoman soon! 


Sunday, May 4, 2014

Farmhouse Table Inspiration

Hi ya'll,
It's beautiful weather in Texas here! Hopefully it will stick around for awhile before turning to 100 degree heat! 
Lately my Pinterest obsession has been rustic farmhouse tables.  My friend's husband does demolition and guess what? He gets to tear down an old barn and guess who gets some old barnwood? We do!! So we are going to build some rustic farmhouse dining tables. Eek!!! I'm so excited!
I can't wait to get started, but until then, I've been scouring Pinterest for some inspiration. 
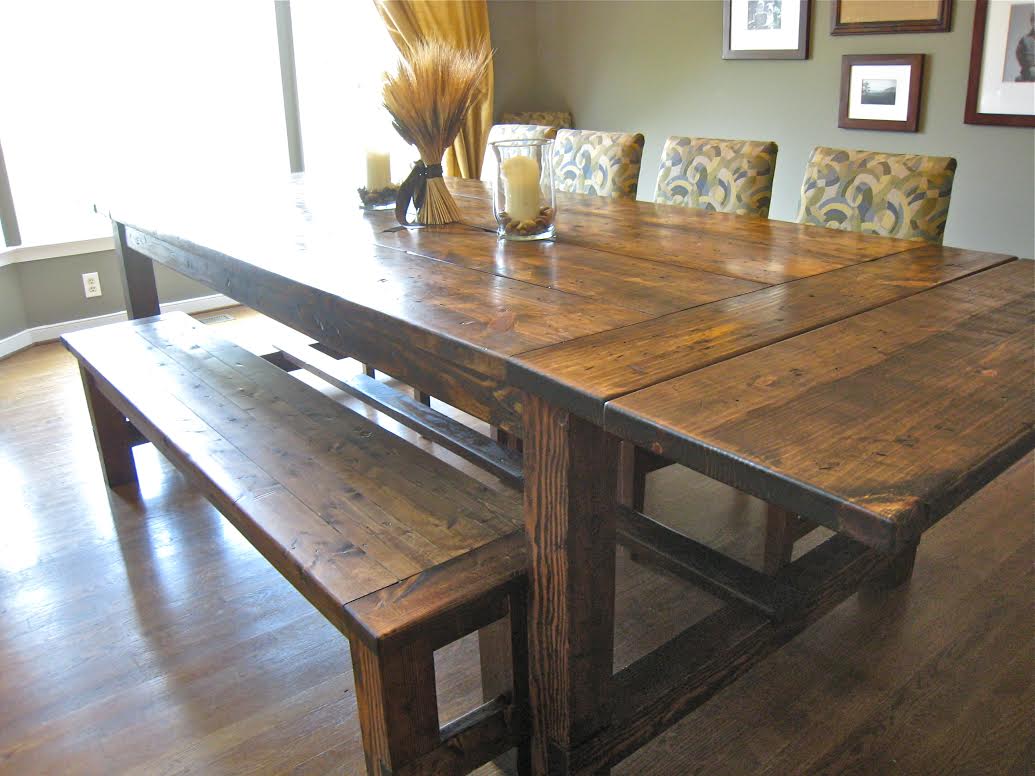
Here's one I spotted on Nest of Bliss.


I love the mix of the rustic table with the traditional tufted chairs. Beautiful!!
She got the plans from Ana White here.

I saw this idea on tommie and ellie that I thought was so cute!
How cute are the carved initials?! LOVE!

Here's a Restoration Hardware knockoff also from Tommie and Ellie's blog that has very thorough instructions and a cut list. I love that it has extensions and a bench. 

I also like the legs on this Restoration hardware 1930's inspired farmhouse table:

I can't wait to make my own! I will definitely post pics of the whole process once I get started. 

Hugs!
Stephanie

Monday, November 7, 2011

A great way to showcase your child's artwork

If you have kids, then you are inundated with artwork...not just any art, but their masterpieces! I have a hard time getting rid of stuff that my son has created, but I know it will begin to take over the house if I don't get it under control

I am IN LOVE with this idea from Jen at http://jengrantmorris.blogspot.com/.  She took her child's artwork, scanned it into photoshop and turned it black and white and then blew it up in size. Then she took fabric markers and traced them onto a duvet cover. Oh my goodness. How cute is this?


A custom duvet cover created by your child. 

Right now, Levi's drawings are mostly scribbles, but as he gets older and the artist in him starts coming out, I am SO going to do this! 


,What creative ways have you come up with to display your child's artwork?


Saturday, November 5, 2011

Dresser Turned Buffet: The finished product!

About a year ago, I purchased a dresser from a thrift store near my house.  As soon as I saw it, I could tell it was a good, solid piece of furniture and I loved the lines and the details of it! The best part was it was only $36!  I decided to turn it into a buffet for our kitchen area.  Several months ago, I painted it a bluish gray color but when I put it in our dining area, I wasn't crazy about the color against our walls. So it sat there for a while until a few weeks ago when I got a sudden burst of inspiration and decided to go bold and paint it peacock blue. I am SO glad I did! 

I KNOW I took a before picture but I can't find it anywhere on my computer, so I found a pic on google images that was very similar to the dresser I found at the thrift store:


I decided to take out the bottom 4 drawers and put paneling on the back and sides.  I filled in the holes on the top 2 drawers with wood filler and we drilled 1 hole in each.


Next, I painted it Peacock blue, then I sanded around the edges to give it a distressed look.  Then I painted the paneling a glossy white and added my Hobby Lobby knobs! Now, I have to find 2 matching baskets to put in the bottom!


I would LOVE to see your furniture redos! Post a comment with the link!


Thursday, November 3, 2011

Trendspotting: BIRCH

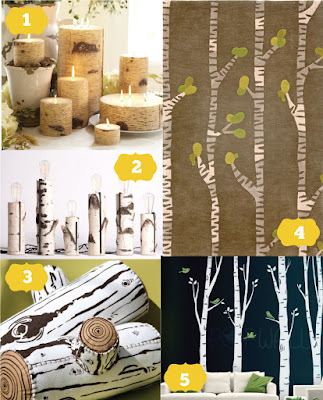
Everywhere I look these days, I am seeing birch.  I love using natural textures inside the home.  


1.  Birch Candles from Pottery Barn 
2.  Autumn Workshop's touch lamps from inhabitat.com are made from repurposed birch log pieces.
3.  Birch Pillows sold on Etsy {no longer available}
4.  Birch hand tufted wool rug by Angela Adams
5.  Tall Birch Trees with Flying Birds--art wall sticker wall decal


A little more affordable Birch Candles from World Market


Don't get me wrong, I LOVE you Pottery Barn, but I am NOT paying $55 for a candle! I don't care how pretty it is, it's still a candle. Especially, when you can make one just like it yourself!  So my next project is going to be making some birch candles of my own.


I saw this adorable project with tutorial on Martha Stewart.com which gave me some inspiration.  {How cute are those little birds??}


It's just birch paper wrapped around toilet paper rolls...AND the birch paper can be downladed free here!

Also, here's a link to a free birch graphic thats a larger scale that you could wrap around some candles to mimic the Pottery Barn look.

I can't wait to make some of these! I'll post them as soon as I get them done!!

Tuesday, November 1, 2011

3 Thanksgiving DIY projects

Now that Halloween is officially over, it's time to start decorating the house for Thanksgiving! I have been searching through Pinterest for some fun {cheap} DIY ideas and here are 3 of the best that I have found so far:

1.  Thanksgiving Centerpiece


You could use pumpkins that you already have from Halloween, paint them white and add the vinyl letters. This would be great for a mantle too using the little mini pumpkins.  I love how they are all stacked at different heights. VERY CUTE!  The link is found here.

2.  Thankful Subway Sign
I am totally IN LOVE with all the subway art out there. I love typography as an art form and I think these are a great way to personalize your home decor.  I think this one is a great reminder of all the little things that we take for granted.  I found this on Pinterest and it didn't link back to anything, so I don't know where to give credit.  I WILL be making this!

3.  Twigs and Candles


I love incorporating nature with the indoors. This project found here would cost nothing to make.  Just hot glue branches to votives that you already have. 

I'm totally inspired now to start my Thanksgiving decorating! Thank you Pinterest for giving me SOOOOO many ideas!!


Saturday, October 29, 2011

Spiderwebs made out of trashbags: the result

I absolutely LOVE this time of year! I think part of the reason is because my mom, my sister and I all have birthdays in October and November.  But I also love wearing sweaters and drinking hot chocolate by the fire and going to high school football games and everything else that goes along with fall!  I'm not crazy about all the creepy, scary halloween stuff, but I did think these trashbag spiderwebs by How About Orange were REALLY cute! 


The result: I give it a 10! The tutorial was really easy to follow and best of all, it didn't cost any money! If you try it, post pictures so I can see it! 

Wednesday, October 26, 2011

Hudson's 1st Birthday Party Part 3...Rainbow Cake and tissue paper lanterns

 Rainbow Cake
For my boys' birthdays, I always do a rainbow cake! I first saw the idea on omnomicon.com. I remember thinking it was worth a shot, but I was pretty sure it would not come out like the picture. Well, guess what...it does!! It is so easy to make and it ALWAYS impresses the guests. It looks so much harder to make than it is. 


Aren't the colors so fun?


Supplies:

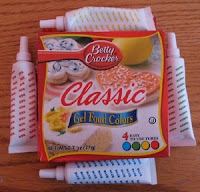
Directions:

Divide cake mix into 6 different bowls. Dump 2/3 of the cake batter into the first bowl, and then dump decreasingly smaller amounts into each bowl thereafter.  So the first bowl is going to have the most and the last bowl is going to have the least amount. Make sense?  Then, mix in the gel food colors into each bowl, one for each color.


Next, you're going to dump the cake mix (already mixed according to package directions) into the pan, starting with the bowl that has the MOST.  If you don't, the last color will overwhelm all of the rest. Pour directly into the center of the pan.  Pour the next bowl directly on top of the first circle, and so on. The cake mix will naturally spread out as you pour right on top of each other.


I also did cupcakes the same way.


The finished product. (Picture courtesy of Omnnomicon)

So cute, right? 

Tissue Paper Lanterns


I first saw the tutorial for the tissue paper lanterns here on Martha Stewart.com. (Good ol' Martha comes through again!"


Look at the napkin holders...LOVE!


Just stack 8 pieces of tissue paper together and make 1-1/2 inch accordian folds.  (Like a fan)


Tie in the middle with a twisty tie or wire. You can trim the ends into rounded or pointy shapes if desired (The red one is not cut, the blue one, I cut pointy ends)


Then separate the layers, pulling away from the center, one at a time until you have a nice round circle.


The finished product! Of course its even cuter with Hudson in the picture! :-)