Tuesday, May 13, 2014

Giveaway Winner!


Hey ya'll, it's time to announce the winner of my giveaway! So sorry for all the trouble with rafflecopter. For those of you that left comments, I entered you in manually.  So with that being said, the winner of the 16x20 digital chalkboard love story print is.......


Cynthia Richardson!!

I hope your son and daughter-in-law enjoy it :-) I will email you shortly.

Thanks again for everyone that participated in the giveaway! Be watching for more to come!

Tuesday, May 6, 2014

Furniture Re-Do's

Happy Monday ya'll! I'm getting the itch to do another furniture makeover so I thought I would share a couple I have done recently. I will be posting the tutorial on the tufted ottoman soon! 


Monday, May 5, 2014

Custom Printable Love Story Chalkboard GIVEAWAY!

I made this to capture all of the most important memories in my life. I have it up on my mantel and it reminds me everyday of how blessed that I am! I am so excited to create a custom one for the winner of this giveaway! 


Once the contest ends, I will email the winner and have you send me your dates that you would like added to your custom sign.  This giveaway is for a 16x20 DIGITAL file.  You can have it printed at any office supply store for super cheap. Office Depot does a great job! Good Luck!

a Rafflecopter giveaway


Sunday, May 4, 2014

Farmhouse Table Inspiration

Hi ya'll,
It's beautiful weather in Texas here! Hopefully it will stick around for awhile before turning to 100 degree heat! 
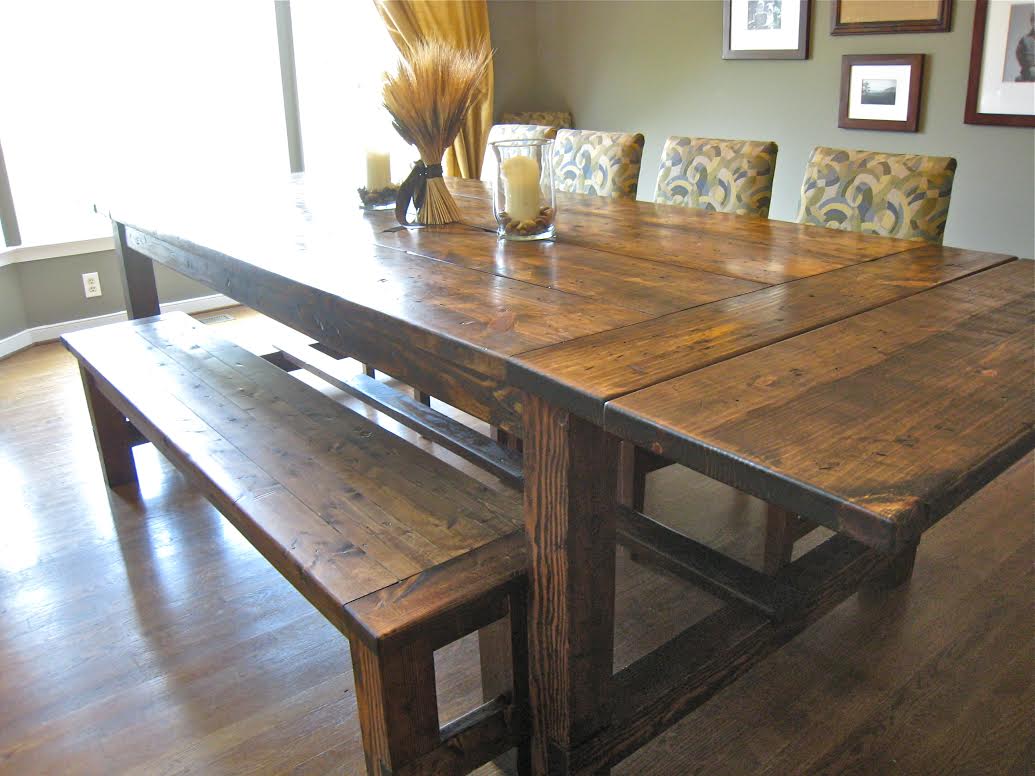
Lately my Pinterest obsession has been rustic farmhouse tables.  My friend's husband does demolition and guess what? He gets to tear down an old barn and guess who gets some old barnwood? We do!! So we are going to build some rustic farmhouse dining tables. Eek!!! I'm so excited!
I can't wait to get started, but until then, I've been scouring Pinterest for some inspiration. 
Here's one I spotted on Nest of Bliss.


I love the mix of the rustic table with the traditional tufted chairs. Beautiful!!
She got the plans from Ana White here.

I saw this idea on tommie and ellie that I thought was so cute!
How cute are the carved initials?! LOVE!

Here's a Restoration Hardware knockoff also from Tommie and Ellie's blog that has very thorough instructions and a cut list. I love that it has extensions and a bench. 

I also like the legs on this Restoration hardware 1930's inspired farmhouse table:

I can't wait to make my own! I will definitely post pics of the whole process once I get started. 

Hugs!
Stephanie

Thursday, April 24, 2014

Family Love Story Chalkboard

This morning I'm sharing one of my favorite projects that I've done.  I love this because it captures the best days of my life--dating my hubby, marriage and the birth of my boys!


Gather up your Materials:
  • 16x20 canvas (or size of your choice)
  • chalk
  • white colored pencil
  • printer and paper
  • black paint
  • computer and your favorite fonts
  • burlap
  • nailheads
So here's what you do:

  1. Paint your canvas black

     2. While your paint is drying, grab a cup of coffee and open up Adobe Illustrator or Microsoft Word (or whatever program you prefer) and set your paper size to the size of the canvas.  I made mine 16x20.  (I used Adobe Illustrator, but it can be done in Word.)

     3.    Pick 4 or 5 fonts that you want to use.  I used:
      4.  Design your artwork.
(No our last name is not Bennett, but my mom and grandma freaked me out and told me I didn't need to put all that info out in blog world so I changed some dates and names to protect the innocent. Please don't stalk me, K?


     5.  Print out your design in sections on 8.5 x 11 paper and tape together to create 1 16x20 piece of paper. (Sorry, forgot to take a picture of this part!)

     6.  Cover the back of the paper with white chalk.  Make sure to cover every inch.

     7.  Turn the paper over and place on the canvas so the chalk side  is touching the canvas.

     8.  Take a sharp pencil and trace over each word.  This will transfer the chalk on the canvas.


       9.  Next, take a sharpened white colored pencil and trace over each letter. (Hand. Hurting. Must. Power. Through.)

      10.  Spray with fixative (or hairspray) (Almost done!)

      11.  Lastly, we will cover the sides with burlap and nailheads.  Cut strips of burlap to fit the sides of the canvas.  Attach it with 3-4 nailheads per side.


   If you don't feel like making one, I have digital versions available (custom made to order) in my Etsy shop here!

Wednesday, April 23, 2014

Back with another meal planner freebie!

Hey ya'll,
So life has been pretty crazy since I last blogged. We moved away from the metroplex into an adorable farmhouse built in the 1800's! It's always been a dream of mine to live in an older home. I love the character and charm of old homes.  I've often thought, "If only these walls could talk!" Imagine the stories they would tell! I have TONS to blog about since I've been on here last, but I'm going to start it off with a freebie because I know everyone loves free stuff, right?  I created a new 2 page meal planner even better than the last (which can be found here). I found that the last one didn't have enough room for groceries so I made it into a 2 page spread.  It can be downloaded for free here for a limited time.  All I ask is that you please follow my blog and stay tuned for lots of fun stuff!


Click here to download the FREE meal planner!

Sunday, January 15, 2012

Family planner freebie


By nature I am not a very organized person. Just ask my husband and he will tell you! But in my defense, he is on the complete opposite spectrum almost to the extent of being OCD so according to his standards, most people would be considered disorganized! I really want to be organized, its just that I always start out that way, and well, you know what happens. So a few years ago I started making my own family planner.  I just finished making mine for this year and its hot off the press so I thought I would share! This has been such a lifesaver for us and it is one portion of my life that is organized! Here is the link to download your own copy.  The set includes a title page, monthly calendars, meal planners, a project to do list, notes and a back cover. 

Here's some pics of the finished product. I had it printed and bound at Office Depot and it looks really nice!


monthly calendars 

project planner


weekly meal planner

Hope you enjoy!!