Showing posts with label fall. Show all posts

Wednesday, October 15, 2014

Fall Birthday Bash


HAPPY FALL!!
This is my absolute favorite time of the year! Pumpkins, hayrides, sweaters, football, coffee, birthdays.... Ahhh pure bliss! I thought a fall themed party for my son's 4th birthday would be the perfect start to fall! I don't know who had more fun, the adults or the kids! 

The Invitation:
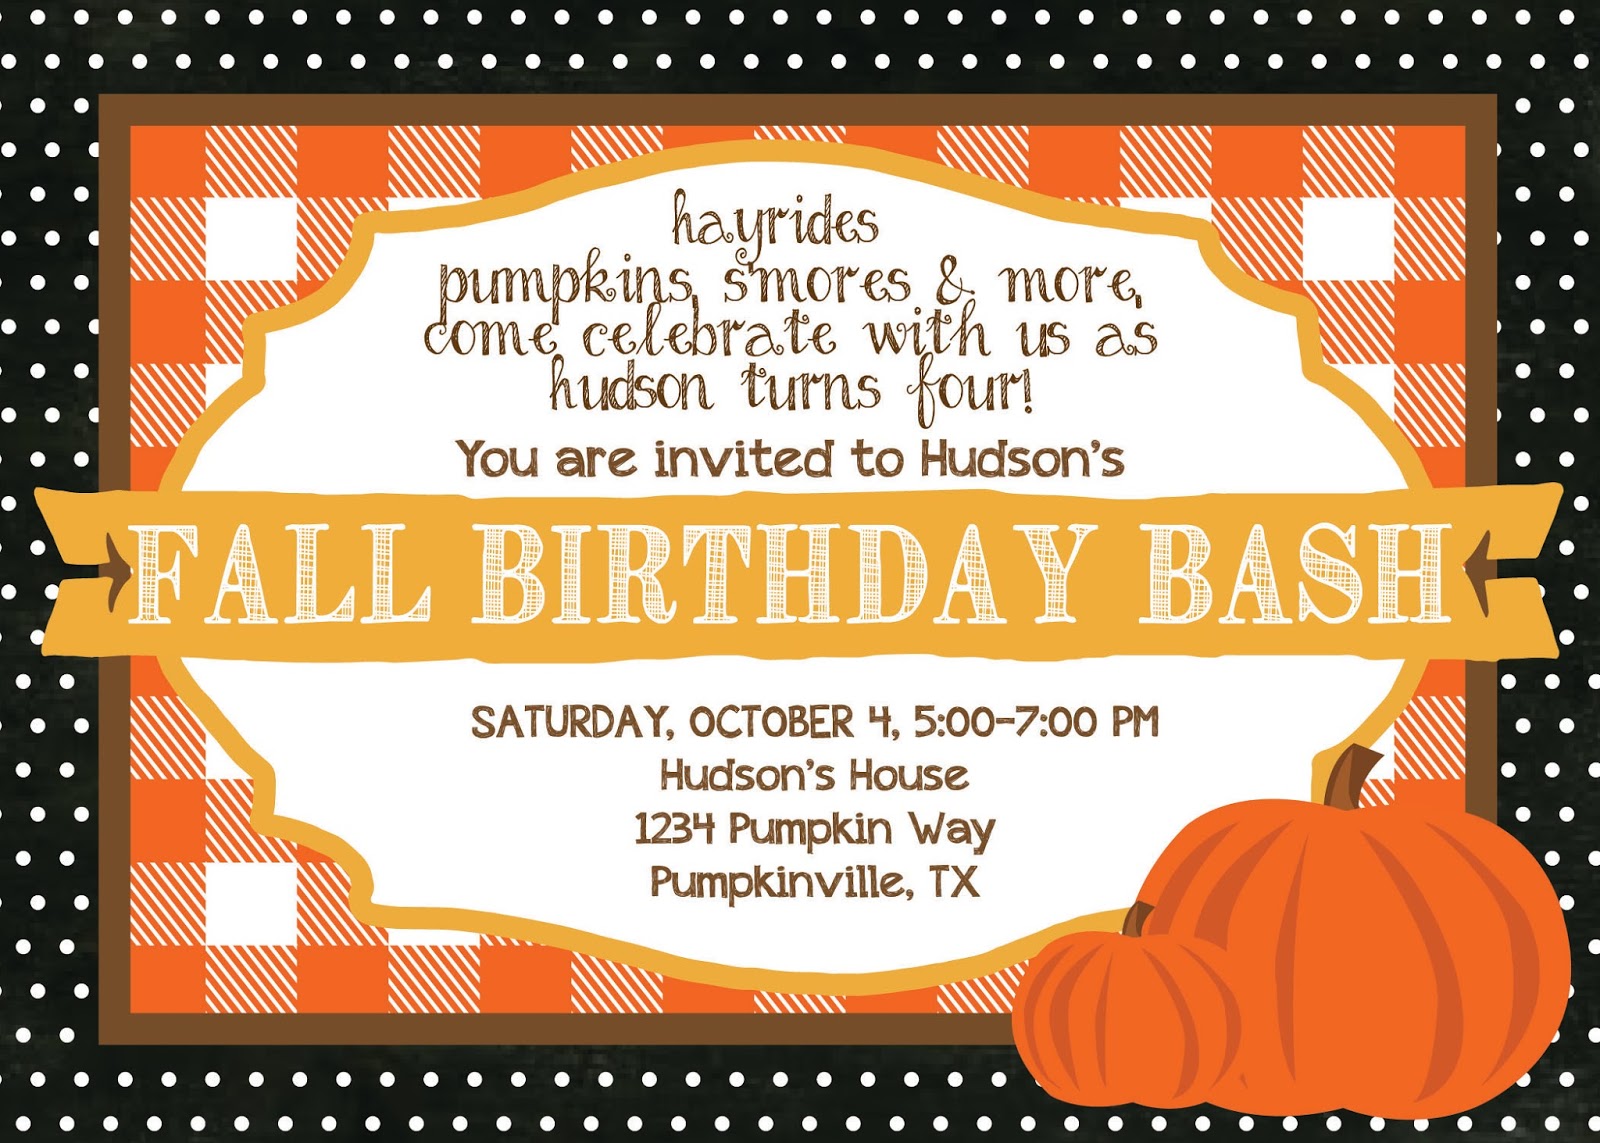
The invitation is available for purchase in my Etsy shop.

The Decorations


The Menu:
Frito Pies
Hot Dogs
Pumpkin Sugar Cookies
Nectarine pumpkins
Popcorn
Smores


Pumpkin Sugar Cookies:
I found the cookie cutters at Michaels and I used this recipe for the cookies.  I added quite a bit more flour so I could roll out the dough to cut it.  For the royal icing, I used this recipe.  They were a big hit!

Pumpkins:
Ingredients:
Nectarines
Celery
Popcorn:
For this, I just made paper cones out of 12x12 scrapbook paper.  and hung them from a branch that I had my husband cut down.

Activities:
Feed Sack Races


The Hayride

All the kiddos (and Haley)


Thursday, November 3, 2011

Trendspotting: BIRCH

Everywhere I look these days, I am seeing birch.  I love using natural textures inside the home.  


1.  Birch Candles from Pottery Barn 
2.  Autumn Workshop's touch lamps from inhabitat.com are made from repurposed birch log pieces.
3.  Birch Pillows sold on Etsy {no longer available}
4.  Birch hand tufted wool rug by Angela Adams
5.  Tall Birch Trees with Flying Birds--art wall sticker wall decal


A little more affordable Birch Candles from World Market


Don't get me wrong, I LOVE you Pottery Barn, but I am NOT paying $55 for a candle! I don't care how pretty it is, it's still a candle. Especially, when you can make one just like it yourself!  So my next project is going to be making some birch candles of my own.


I saw this adorable project with tutorial on Martha Stewart.com which gave me some inspiration.  {How cute are those little birds??}


It's just birch paper wrapped around toilet paper rolls...AND the birch paper can be downladed free here!

Also, here's a link to a free birch graphic thats a larger scale that you could wrap around some candles to mimic the Pottery Barn look.

I can't wait to make some of these! I'll post them as soon as I get them done!!

Tuesday, November 1, 2011

3 Thanksgiving DIY projects

Now that Halloween is officially over, it's time to start decorating the house for Thanksgiving! I have been searching through Pinterest for some fun {cheap} DIY ideas and here are 3 of the best that I have found so far:

1.  Thanksgiving Centerpiece


You could use pumpkins that you already have from Halloween, paint them white and add the vinyl letters. This would be great for a mantle too using the little mini pumpkins.  I love how they are all stacked at different heights. VERY CUTE!  The link is found here.

2.  Thankful Subway Sign
I am totally IN LOVE with all the subway art out there. I love typography as an art form and I think these are a great way to personalize your home decor.  I think this one is a great reminder of all the little things that we take for granted.  I found this on Pinterest and it didn't link back to anything, so I don't know where to give credit.  I WILL be making this!

3.  Twigs and Candles


I love incorporating nature with the indoors. This project found here would cost nothing to make.  Just hot glue branches to votives that you already have. 

I'm totally inspired now to start my Thanksgiving decorating! Thank you Pinterest for giving me SOOOOO many ideas!!


Saturday, October 29, 2011

Spiderwebs made out of trashbags: the result

I absolutely LOVE this time of year! I think part of the reason is because my mom, my sister and I all have birthdays in October and November.  But I also love wearing sweaters and drinking hot chocolate by the fire and going to high school football games and everything else that goes along with fall!  I'm not crazy about all the creepy, scary halloween stuff, but I did think these trashbag spiderwebs by How About Orange were REALLY cute! 


The result: I give it a 10! The tutorial was really easy to follow and best of all, it didn't cost any money! If you try it, post pictures so I can see it! 

Monday, October 10, 2011

Fall DIY inspiration from Pinterest

Fall is by far my favorite time of year.  I love the crispness that's in the air, going to the pumpkin patch, carving pumpkins and all the fun things that go along with fall. I don't know about you, but Pinterest has really inspired me to do some diy fall decorating! I wanted to do a post about some of the best fall crafts I have seen on Pinterest.  Here are 3 of my faves:


Seriously, how cute are these? And who would have thought that something this cute could come from a corn husk!


Pumpkins and Beadboard...2 of my favorite things!


This was my inspiration for my burlap wreath that is now hanging on my mantel.

Saturday, October 1, 2011

Fall decor using baby food jars


I have been collecting baby food jars for the past few weeks, because I just KNEW I would use them for something! They had been sitting on my counter when alas, I got an idea! Here's what I did:


4 empty baby food jars
vinyl letters (or you could probably use paper and mod podge it)
paint
twine


1. Make sure the baby food jars are clean. Use Goo Gone to get all of the stickiness off.

2. Use your cricut (or print off, trace and cut letters by hand)to cut out the letters, f,a,l and l. Make sure to reverse the image!!

3. Stick the letters on the inside of the jars. Smooth out with your fingers, making sure there are no gaps for the paint to seep under.

4. Paint the inside of the jars. Do about 2-3 coats.

5. Tie twine around the top (I used strips of burlap because that's all I had and it worked just fine)

You could also do this for Valentines Day (Do "LOVE" or "XOXO") or Christmas (Joy,Peace, etc.) The possibilities are endless!!

I plan to get some battery operated tea lights to put inside. (I'm not brave enough to put real ones because I'm not sure if the paint is flammable!)


Fall wreath


So, I don't know about you, but I've been seeing burlap EVERYWHERE! I've seen burlap wreaths all over pinterest and so I decided to make one of my own. I couldn't really find a tutorial I liked, so I just made it up. Here's how I did it. (Sorry for the lack of pictures, I PROMISE I will get better!)

Supplies:
1 yard of Burlap
1 foam wreath (or foam tubing from Lowes)
fabric flowers, etc

1. Cut several 3-4" strips of burlap

2. Take 1 and wrap around the wreath to hide the foam.

3. Take a strip and pin it to the wreath. Take the next pin and pin it so that the burlap "bubbles." Continue until the wreath is filled.

4. Next, get out your trusty hot glue gun and remove the pins 1 by 1, replacing it with hot glue.

5. Finally, add accents, such as ribbon, fabric rosettes, flowers, etc. I made these fabric rosettes by taking 1-2" strips of fabric, tying a knot on the end and then wrapping it around the knot. I then glued cardboard backing onto the back and glued it to the wreath.


And there ya have it. Your own handmade burlap wreath! The best part is, you can customize it to fit any season or holiday. Enjoy!