Monday, November 7, 2011

A great way to showcase your child's artwork

If you have kids, then you are inundated with artwork...not just any art, but their masterpieces! I have a hard time getting rid of stuff that my son has created, but I know it will begin to take over the house if I don't get it under control

I am IN LOVE with this idea from Jen at http://jengrantmorris.blogspot.com/.  She took her child's artwork, scanned it into photoshop and turned it black and white and then blew it up in size. Then she took fabric markers and traced them onto a duvet cover. Oh my goodness. How cute is this?


A custom duvet cover created by your child. 

Right now, Levi's drawings are mostly scribbles, but as he gets older and the artist in him starts coming out, I am SO going to do this! 


,What creative ways have you come up with to display your child's artwork?


Saturday, November 5, 2011

Dresser Turned Buffet: The finished product!

About a year ago, I purchased a dresser from a thrift store near my house.  As soon as I saw it, I could tell it was a good, solid piece of furniture and I loved the lines and the details of it! The best part was it was only $36!  I decided to turn it into a buffet for our kitchen area.  Several months ago, I painted it a bluish gray color but when I put it in our dining area, I wasn't crazy about the color against our walls. So it sat there for a while until a few weeks ago when I got a sudden burst of inspiration and decided to go bold and paint it peacock blue. I am SO glad I did! 

I KNOW I took a before picture but I can't find it anywhere on my computer, so I found a pic on google images that was very similar to the dresser I found at the thrift store:


I decided to take out the bottom 4 drawers and put paneling on the back and sides.  I filled in the holes on the top 2 drawers with wood filler and we drilled 1 hole in each.


Next, I painted it Peacock blue, then I sanded around the edges to give it a distressed look.  Then I painted the paneling a glossy white and added my Hobby Lobby knobs! Now, I have to find 2 matching baskets to put in the bottom!


I would LOVE to see your furniture redos! Post a comment with the link!


Canvas Giveaway WINNER!!


AND THE WINNER IS:

Drumroll please..............

Sweatpants Diva!!

Sweatpants Diva said...

I was married back in July and still haven't gotten any of our wedding photos printed! It would nice to have at least one piece of photographic proof!
October 19, 2011 9:24 AM
 
Congrats Sweatpants Diva!! I have sent you an email. Congrats on your new marriage too!
 
If anyone else would like to purchase one, email me at taylorgraydesigns@gmail.com and I will give you my pricing.
 

Thursday, November 3, 2011

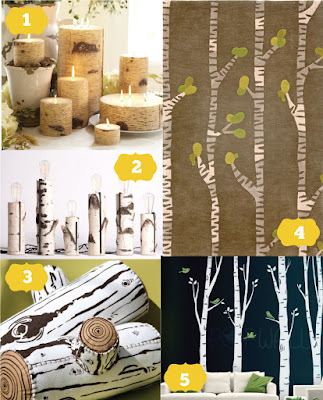
Trendspotting: BIRCH

Everywhere I look these days, I am seeing birch.  I love using natural textures inside the home.  


1.  Birch Candles from Pottery Barn 
2.  Autumn Workshop's touch lamps from inhabitat.com are made from repurposed birch log pieces.
3.  Birch Pillows sold on Etsy {no longer available}
4.  Birch hand tufted wool rug by Angela Adams
5.  Tall Birch Trees with Flying Birds--art wall sticker wall decal


A little more affordable Birch Candles from World Market


Don't get me wrong, I LOVE you Pottery Barn, but I am NOT paying $55 for a candle! I don't care how pretty it is, it's still a candle. Especially, when you can make one just like it yourself!  So my next project is going to be making some birch candles of my own.


I saw this adorable project with tutorial on Martha Stewart.com which gave me some inspiration.  {How cute are those little birds??}


It's just birch paper wrapped around toilet paper rolls...AND the birch paper can be downladed free here!

Also, here's a link to a free birch graphic thats a larger scale that you could wrap around some candles to mimic the Pottery Barn look.

I can't wait to make some of these! I'll post them as soon as I get them done!!

Tuesday, November 1, 2011

3 Thanksgiving DIY projects

Now that Halloween is officially over, it's time to start decorating the house for Thanksgiving! I have been searching through Pinterest for some fun {cheap} DIY ideas and here are 3 of the best that I have found so far:

1.  Thanksgiving Centerpiece


You could use pumpkins that you already have from Halloween, paint them white and add the vinyl letters. This would be great for a mantle too using the little mini pumpkins.  I love how they are all stacked at different heights. VERY CUTE!  The link is found here.

2.  Thankful Subway Sign
I am totally IN LOVE with all the subway art out there. I love typography as an art form and I think these are a great way to personalize your home decor.  I think this one is a great reminder of all the little things that we take for granted.  I found this on Pinterest and it didn't link back to anything, so I don't know where to give credit.  I WILL be making this!

3.  Twigs and Candles


I love incorporating nature with the indoors. This project found here would cost nothing to make.  Just hot glue branches to votives that you already have. 

I'm totally inspired now to start my Thanksgiving decorating! Thank you Pinterest for giving me SOOOOO many ideas!!


Saturday, October 29, 2011

The Boys' Halloween Costumes

When I asked Levi what he wanted to be for Halloween this year, it was no big surprise when he said "Mater"!! I love homemade Halloween costumes, so I set out to make him a one-of-a-kind Mater costume. I'm good at coming up with ideas, but my husband is good at figuring out how to pull it off.  I knew I wanted to make it out of boxes, but I left the rest up to him.  I drew the eyes and made the teeth and headlights and VIOLA!! Ladies and gentlemen, we have a MATER!!


 Of course we had to dress little brother up as Lightning Mcqueen! 


This picture was taken at our church's "Trunk or Treat" I will post more after we go Trick or Treating Monday night!!

Spiderwebs made out of trashbags: the result

I absolutely LOVE this time of year! I think part of the reason is because my mom, my sister and I all have birthdays in October and November.  But I also love wearing sweaters and drinking hot chocolate by the fire and going to high school football games and everything else that goes along with fall!  I'm not crazy about all the creepy, scary halloween stuff, but I did think these trashbag spiderwebs by How About Orange were REALLY cute! 


The result: I give it a 10! The tutorial was really easy to follow and best of all, it didn't cost any money! If you try it, post pictures so I can see it! 

Friday, October 28, 2011

Friday Freebie! Recipe Card Template and recipe


Here's the link for the freebie! And here's a copy of one of my FAV fall recipes...Texas Chowder.  This recipe is from a place called The Dove's Nest in Waxahachie, Texas.  It is so good that I usually double the recipe and my family and I eat on it for a couple days...if it lasts that long!  YUMM!


Wednesday, October 26, 2011

Hudson's 1st Birthday Party Part 3...Rainbow Cake and tissue paper lanterns

 Rainbow Cake
For my boys' birthdays, I always do a rainbow cake! I first saw the idea on omnomicon.com. I remember thinking it was worth a shot, but I was pretty sure it would not come out like the picture. Well, guess what...it does!! It is so easy to make and it ALWAYS impresses the guests. It looks so much harder to make than it is. 


Aren't the colors so fun?


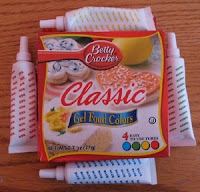
Supplies:

Directions:

Divide cake mix into 6 different bowls. Dump 2/3 of the cake batter into the first bowl, and then dump decreasingly smaller amounts into each bowl thereafter.  So the first bowl is going to have the most and the last bowl is going to have the least amount. Make sense?  Then, mix in the gel food colors into each bowl, one for each color.


Next, you're going to dump the cake mix (already mixed according to package directions) into the pan, starting with the bowl that has the MOST.  If you don't, the last color will overwhelm all of the rest. Pour directly into the center of the pan.  Pour the next bowl directly on top of the first circle, and so on. The cake mix will naturally spread out as you pour right on top of each other.


I also did cupcakes the same way.


The finished product. (Picture courtesy of Omnnomicon)

So cute, right? 

Tissue Paper Lanterns


I first saw the tutorial for the tissue paper lanterns here on Martha Stewart.com. (Good ol' Martha comes through again!"


Look at the napkin holders...LOVE!


Just stack 8 pieces of tissue paper together and make 1-1/2 inch accordian folds.  (Like a fan)


Tie in the middle with a twisty tie or wire. You can trim the ends into rounded or pointy shapes if desired (The red one is not cut, the blue one, I cut pointy ends)


Then separate the layers, pulling away from the center, one at a time until you have a nice round circle.


The finished product! Of course its even cuter with Hudson in the picture! :-)


Tuesday, October 25, 2011

Spiderwebs made out of trashbags!


I found this idea on one of my favorite blogs, How About Orange. It is spiderwebs made out of trashbags!  The tutorial can be found here.  I am going to attempt this and I will show you my finished result as soon as I get it done! I'm all about projects that use items you already have on hand!!

Monday, October 24, 2011

Hudson's 1st Birthday Party Part 2

Anybody that knows me knows that I am a HUGE DIYer.  It's probably because I've had to live on my hubby's Pastor's salary for the last 7 years plus my background in interior design :-) I got a TON of ideas for the party from Pinterest and just by browsing around on the internet.  Here's a list showing what I did...all for $50 bucks!!

Invitations: Free (I designed them and a friend, who owns a print shop, printed them for free)
Tablecloths: Free (I borrowed them from the church)
Lanterns: $2 (I already had the white and I bought 2 packages of tissue paper for the red and blue
Cake and cupcakes: $15
Onesie: Free (I used some printable iron-on sheets I had on hand and ironed them onto a white onesie that I
              already had)
Pillow: Free (same as above)
Party favors: $7 (treat sacks plus gummy worms)
Owl masks: free (I used scrapbook paper I already had)
Hot dogs: $20
Plates and napkins: $6
cake stands: free (made with candle holders and plates that I had on hand plus owls that I printed off my
                   computer)

Total: $50 

So the moral of the story is...Use what you have, borrow what you don't have, make what you can and buy the rest! :-)


Saturday, October 22, 2011

Hudson's 1st Birthday Part 1

My friend, Krissy from Little Photography Shack does AMAZING work.  She just posted these pictures of Hudson's party on her blog. I am so glad I decided to have her come to the party to take pictures.  I am so bad about forgetting to take pictures, and this way, I could enjoy the party and not have to worry about capturing the memories!  


We made the table look like a bed by putting a white tablecloth over a red one and folding the white one back, like a sheet. My dad drew the headboard and I made the pillow with printable iron on sheets.  I made the cupcake stands with candle holders that I had on hand and duck-taped (shhh...) the plates to the top.  


We were so thankful to have great weather so we could have the party outside!  I already had the white lanterns and I made the red and blue paper lanterns out of tissue paper to add some color.


My 2 favorite boys in the whole world!


Levi takes after his daddy, he can't take a serious picture :D


Peekaboo...Hudson's favorite game!


I got the idea for the cupcakes off of Pinterest. Who knew M&M's and oreos could be so cute!


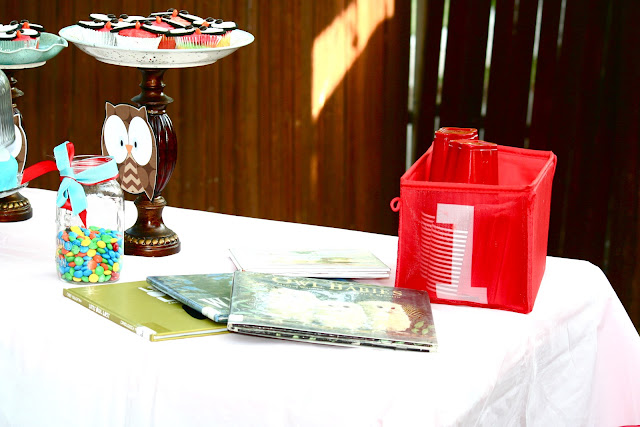
We checked out some owl books from the library. The plan was to have storytime for the kiddos, but we ran out of time. They made cute table decorations though!


Hudson and Grandpa


All the little hoot owls

I made these owl masks out of scraps of scrapbook paper that I had on hand that matched the colors of the party. 

Haha, I love this expression. He's thinking, "Are you going to make me get dirty again??!"

Happy 1st birthday, Hudson!